I have been running my blog on the Orchard Core CMS, which I was happy with all the time. But for just running my blog it is a bit of an overhead and also since I have heared of Wyam I really wanted to try it out.
What is Wyam
Wyam is a static page generator built on .Net Core by David Glick. I am familiar with Markdown, Razor and the .Net Core eco system, so this is the best solution I can think of for me.
It's a static content toolkit and can be used to generate web sites, produce documentation, create ebooks, and much more. Since everything is configured by chaining together flexible modules (that you can even write yourself), the only limits to what it can create are your imagination.
David Glick is also the creator and maintainer of Discover .NET. A great page for any OSS Developer and .Net enthusiast.
Installing Wyam
Wyam can be installed as a dotnet global tool, type the following in your command line:
dotnet tool install --global wyam.tool
There are more options on how to install Wyam here, but in my opinion this is the easiest way to do it on Windows.
Creating a new blog
Wyam has the concept of recipes for creating new sites. There is a detailed page about the blog recipe that I have used. But to get started run the following three commands on the command line:
mkdir blog
cd blog
wyam new –r Blog
The last command wyam new –r Blog will generate the site in the current directory. To look at the page in the browser we first need to build the static html files by calling wyam build –r Blog –t CleanBlog. By calling the build command with the -r and -t pararmeter we tell wyam to build the Blog Recipe with the CleanBlog theme. Those parameters can also be added into the config.wyam. Then just call wyam build.
#recipe Blog
# Wyam.Markdown
#t CleanBlog
To preview the site on the local computer run the preview command on the command line:
wyam preview
This will start up a webserver where the site will be hosted locally.
Creating a new post
Creating a new post is as easy as dropping a markdown file into the /posts folder
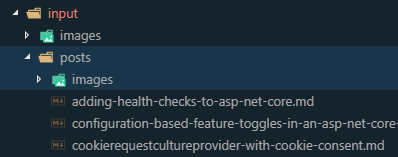
and adding the proper frontmatter to the file.
Title: My First Blog Post
Published: 1/2/2019
Tags:
    - Blog
    - Wyam
    - Awesomeness
    - Asp.Net Core
---
Blog content …
Adjusting the default layout
My blog with orchard core was already based on the CleanBlog theme. I personally like the theme because of its simple layout. I did not want to change a lot on the default theme, but there are two or three changes to the default layout that I wanted.
Wyam allows to adjust the default theme by overriding sections or by supplying own css stlyes. In my case I wanted to change the Footer of each page. I went to the CleanBlog theme on the Wyam Github repository and downloaded the _Footer.cstml into the input folder. Wyam will now override the default _Footer.cshtml with the one provided from my input folder. The rest is normal HTML and Razor magic.
Adding disqus comments
There is an empty _PostFooter.cshtml partial view in the CleanBlog theme that is intended exactly for this. This partial view will be rendered at the bottom of every post and you can put anything in there that you want to appear on the bottom of each post. So all that had to be done was to create a _PostFooter.cshtml file inside the input folder and add the disqus markup.
<div id="disqus_thread"></div>
<script type="text/javascript">
    /* * * CONFIGURATION VARIABLES: EDIT BEFORE PASTING INTO YOUR WEBPAGE * * */
    var disqus_shortname = 'ml-software'; // required: replace example with your forum shortname
    var disqus_identifier = '@Model.FilePath(Keys.RelativeFilePath).FileNameWithoutExtension.FullPath';
    var disqus_title = '@Model.String(BlogKeys.Title)';
    var disqus_url = '@Context.GetLink(Model, true)';
    /* * * DON'T EDIT BELOW THIS LINE * * */
    (function() {
        var dsq = document.createElement('script'); dsq.type = 'text/javascript'; dsq.async = true;
        dsq.src = '//' + disqus_shortname + '.disqus.com/embed.js';
        (document.getElementsByTagName('head')[0] || document.getElementsByTagName('body')[0]).appendChild(dsq);
    })();

    (function () {
        var s = document.createElement('script'); s.async = true;
        s.type = 'text/javascript';
        s.src = '//' + disqus_shortname + '.disqus.com/count.js';
        (document.getElementsByTagName('HEAD')[0] || document.getElementsByTagName('BODY')[0]).appendChild(s);
    }());
</script>
<noscript>Please enable JavaScript to view the <a href="http://disqus.com/?ref_noscript">comments powered by Disqus.</a></noscript>
<a href="http://disqus.com" class="dsq-brlink">comments powered by <span class="logo-disqus">Disqus</span></a>
Migrating previous posts
All my posts until now (well not that many since I only started blogging last summer, thank you @damienbod for encouraging me) were already stored as markdown text inside the orchard core database. So all I had to do was to copy and paste the content from the admin interface of my orchard core blog and drop them into Markdown files inside my /posts folder and add the required metadata (frontmatter) to the files.
That was it – well no entirely…
My old blog posts had the following url https://ml-software/blog/{slug} and for the default setup of wyam they will be located at https://ml-software/posts/{slug}. I had the option of either adjusting the pipeline of the wyam build or even simpler add one line of metadata to my old blog posts. Wyam can handle this through the RedirectFrom meta tag like so:
Title: My First Blog Post
Published: 1/2/2019
Tags:
    - Blog
    - Wyam
    - Awesomeness
    - Asp.Net Core
RedirectFrom: blog/{slug}
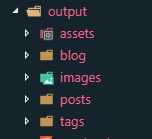
Simple, right? What happened behind the scene was that Wyam created a post and blog folder inside the output folder. So all that it is doing, it is providing the resource at both places.
Cake script
The cake script that I am using has three simple steps.
- Build
- Preview
- Deploy
Using the Wyam and Cake.Wyam package the build task is as simple as shown below. Since the actual build pipeline is defined by the recipe and the config.wyam there is nothing more to add here.
Task("Build")
    .Does(() =>
    {
        Wyam(new WyamSettings
        {
            Recipe = "Blog",
            Theme = "CleanBlog",
            UpdatePackages = true
        });
    });
The Preview task is used to start the preview command of Wyam, watch the source files and on every change saved to disk the page will be rebuilt and have the latest content. This is great while writing a post and having the preview open on a second monitor.
Task("Preview")
    .Does(() =>
    {
        Wyam(new WyamSettings
        {
            Recipe = "Blog",
            Theme = "CleanBlog",
            UpdatePackages = true,
            Preview = true,
            Watch = true
        });
    });
My blog that was built with orchard core was hosted on Azure. Which was quite expensive if you wanted to use a custom domain and the always on feature. Since Wyam creates a static page it can be hosted anywhere really. I saw that discoverdot.net was hosted on Netlify so, I took a closer look at them. They offer a free plan. WOW. So it was possible to reduce my cost to nearly $0 per month by moving my blog to Wyam and Netlify.
Since the output of the wyam build command is the static page in the output folder, the last step is to copy that content to the host that serves the pages. In this case I ended up with Netlify. But this could also be hosted on GitHub Pages for example. But for now I stick to Netlify and use the NetlifySharp addin for cake to deploy the build artifact to Netlify.
Task("Deploy")
    .Does(() =>
    {
        var netlifyToken = EnvironmentVariable("NETLIFY_TOKEN");
        if(string.IsNullOrEmpty(netlifyToken))
        {
            throw new Exception("Could not get Netlify token environment variable");
        }

        Information("Deploying output to Netlify");
        var client = new NetlifyClient(netlifyToken);
        client.UpdateSite($"matteo.netlify.com", MakeAbsolute(Directory("./output")).FullPath).SendAsync().Wait();
    });
Setting up continuous integration with Azure DevOps
I am a big fan of Azure DevOps. I have been using Azure DevOps for multiple projects and I really enjoy that it is a platform for all languages. Since I am using a cake build script for this project, my azure-pipeline.yml definition will be as simple as:
trigger:
- master
steps:
  - script: build -target BuildServer
    env:
      NETLIFY_TOKEN: $(NETLIFY_TOKEN)
Summary
That was all for now and my new blog is live! Wyam is a very simple to use static page generator. I will definitely have to look deeper into its source code and enhance my blog. I hope this post was useful, let me know what you think or if you have any questions.
comments powered by Disqus