This blog post is a continuation of Damien's blog post about the creation of verifiable credentials. In his blog post Damien showed how to set up an ASP.NET Core application to obtain a credential from the Trinsic platform. In this part we are going to look at how we can verify these credentials in order to continue some sort of business process. We will continue with the sample that Damien started and after obtaining our driver license we want to sign up for a new insurance. But we can only sign up at this insurance company if we can deliver proof of our driver license.
The code for this can be found on GitHub.
Setup
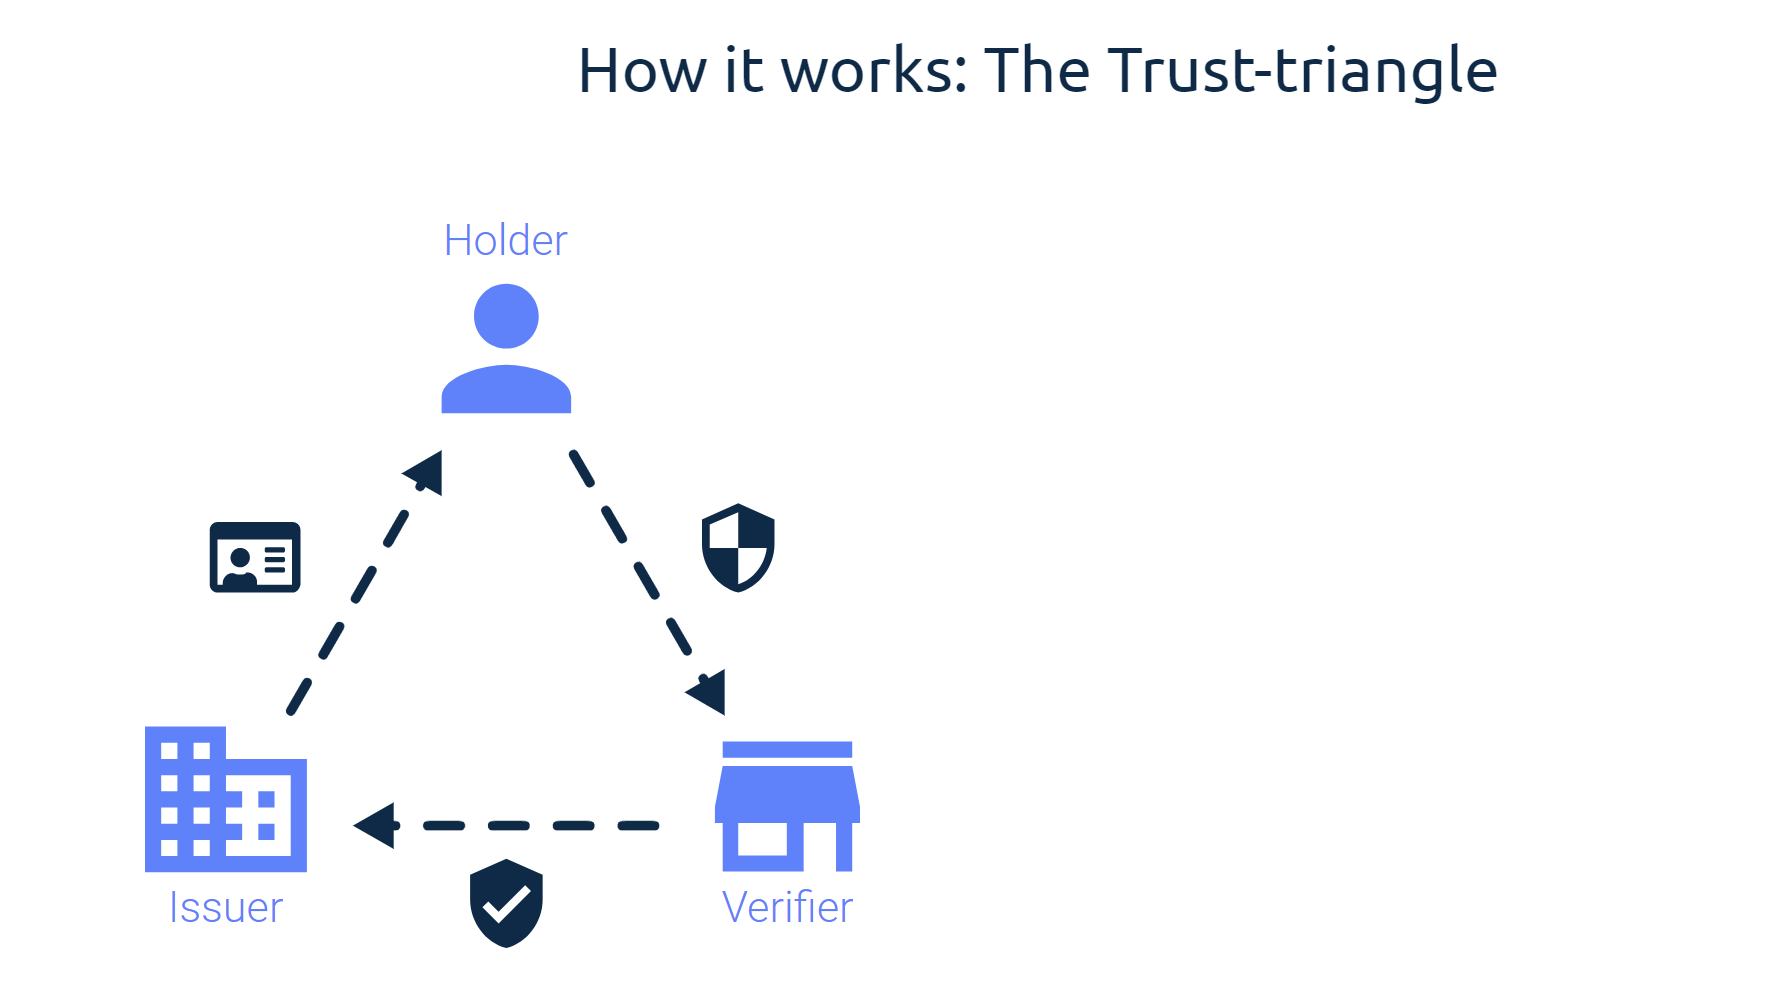
Whilst in Damien's blog post he showed how a verifiable credential can be issued to a so called credential holder, this blog post will be about how we can verify such credentials as part of a business workflow. After an issuer has issued credentials to the holder and they have stored these into their wallet, a verifier can now ask a holder to verify them self with a certain credential. A verifier can add policies to check for certain attributes but also add restrictions like a specific issuer DID. With this in place a verifier can create a verification request which will be sent to the credential holder. This step is very important because it is where a cryptographic challenge is generated that the holder must respond to. This guarantees that the holder is responding to exactly this specific verification request. After the verification request gets returned to the verifier, it needs to be verified against the ledger to make sure it is valid. The verification record does not only contain the attributes, but also some metadata such as the digital signature of the issuer of the credentials, revocation details, verification policies etc. which then get validated against their sources. The image below describes this trust-triangle between the issuer, holder and verifier.
Trinsic Setup
Inside of the Trinsic studio you can now create a new organization. This can be on the same account as you have created the issuer organization but also on a different account works fine. After you have created the organization you need to acquire the API-Key that is required to call the Trinsic API from the verifier application. For this example we did no create a template for the verification request. So there is nothing more to do in the Trinsic Studio.
Connectionless Verifications
For this scenario we used Connectionsless Verifications. These have the ability to create a verification request without having to create a enduring relationship with the credential holder. You can read more about this here.
Implementing the ASP.NET Core Verifier
The verifier application will require a NuGet package offered by Trinsic so make the communication with the Trinsic API easier. Add the Trinsic.ServiceClients package to your project and add the service inside of your startup. Remember to put your API-Key into your user secrets and not in your app settings.
public void ConfigureServices(IServiceCollection services)
{
    services.AddTrinsicClient(options =>
    {
        // For CredentialsClient and WalletClient // Insurance API Key
        // API key of Bo Insurance (Organisation which does the verification)
        options.AccessToken = Configuration["Trinsic:ApiKey"];
    });

    services.AddScoped<IDriversLicenseVerificationService, DriversLicenseVerificationService>();

    services.AddRazorPages();
    services.AddControllers();
}
The logic for the verification is encapsulated inside of the DriversLicenseVerificationService. Due to the limitation of Trinsic only allowing 50 credential exchanges (which include verification requests) there is also a MockService that can be used during development.
When creating a verification request with Trinsic we are creating the policies during runtime instead of using a template in the Trinsic Studio which makes it easier to change. In the policy below we require a certain list of attributes to be present in the credential and also restrict that the credential was issued by a certain issuer with supplying its DID. Otherwise any credential with the attributes present could be used for the verification request.
public async Task<(string verificationId, string verificationUrl)> CreateVerificationRequest()
{
    IList<VerificationPolicyAttributeContract> attributePolicies = new List<VerificationPolicyAttributeContract>()
    {
        new VerificationPolicyAttributeContract()
        {
            PolicyName = "National Driver License Policy",
            AttributeNames = new List<string>()
            {
                "Issued At",
                "Name",
                "First Name",
                "Date of Birth",
                "License Type"
            },
            Restrictions = new List<VerificationPolicyRestriction>()
            {
                new VerificationPolicyRestriction
                {
                    IssuerDid = _issuerDid, // Restrict by issuer identifier
                }
            }
        }
    };

    // Optionally check if a revocable credential is valid at a given time
    var revocationRequirement = new VerificationPolicyRevocationRequirement()
    {
        ValidNow = true
    };

    // Create the verification
    var verificationContract = await _credentialsServiceClient.CreateVerificationFromParametersAsync(
        new VerificationPolicyParameters
        {
            Name = "Driver License Verification",
            Version = "1.0", // Must follow Semantic Versioning scheme (https://semver.org),
            Attributes = attributePolicies,
        });

    return (verificationId: verificationContract.VerificationId, verificationUrl: verificationContract.VerificationRequestUrl);
}
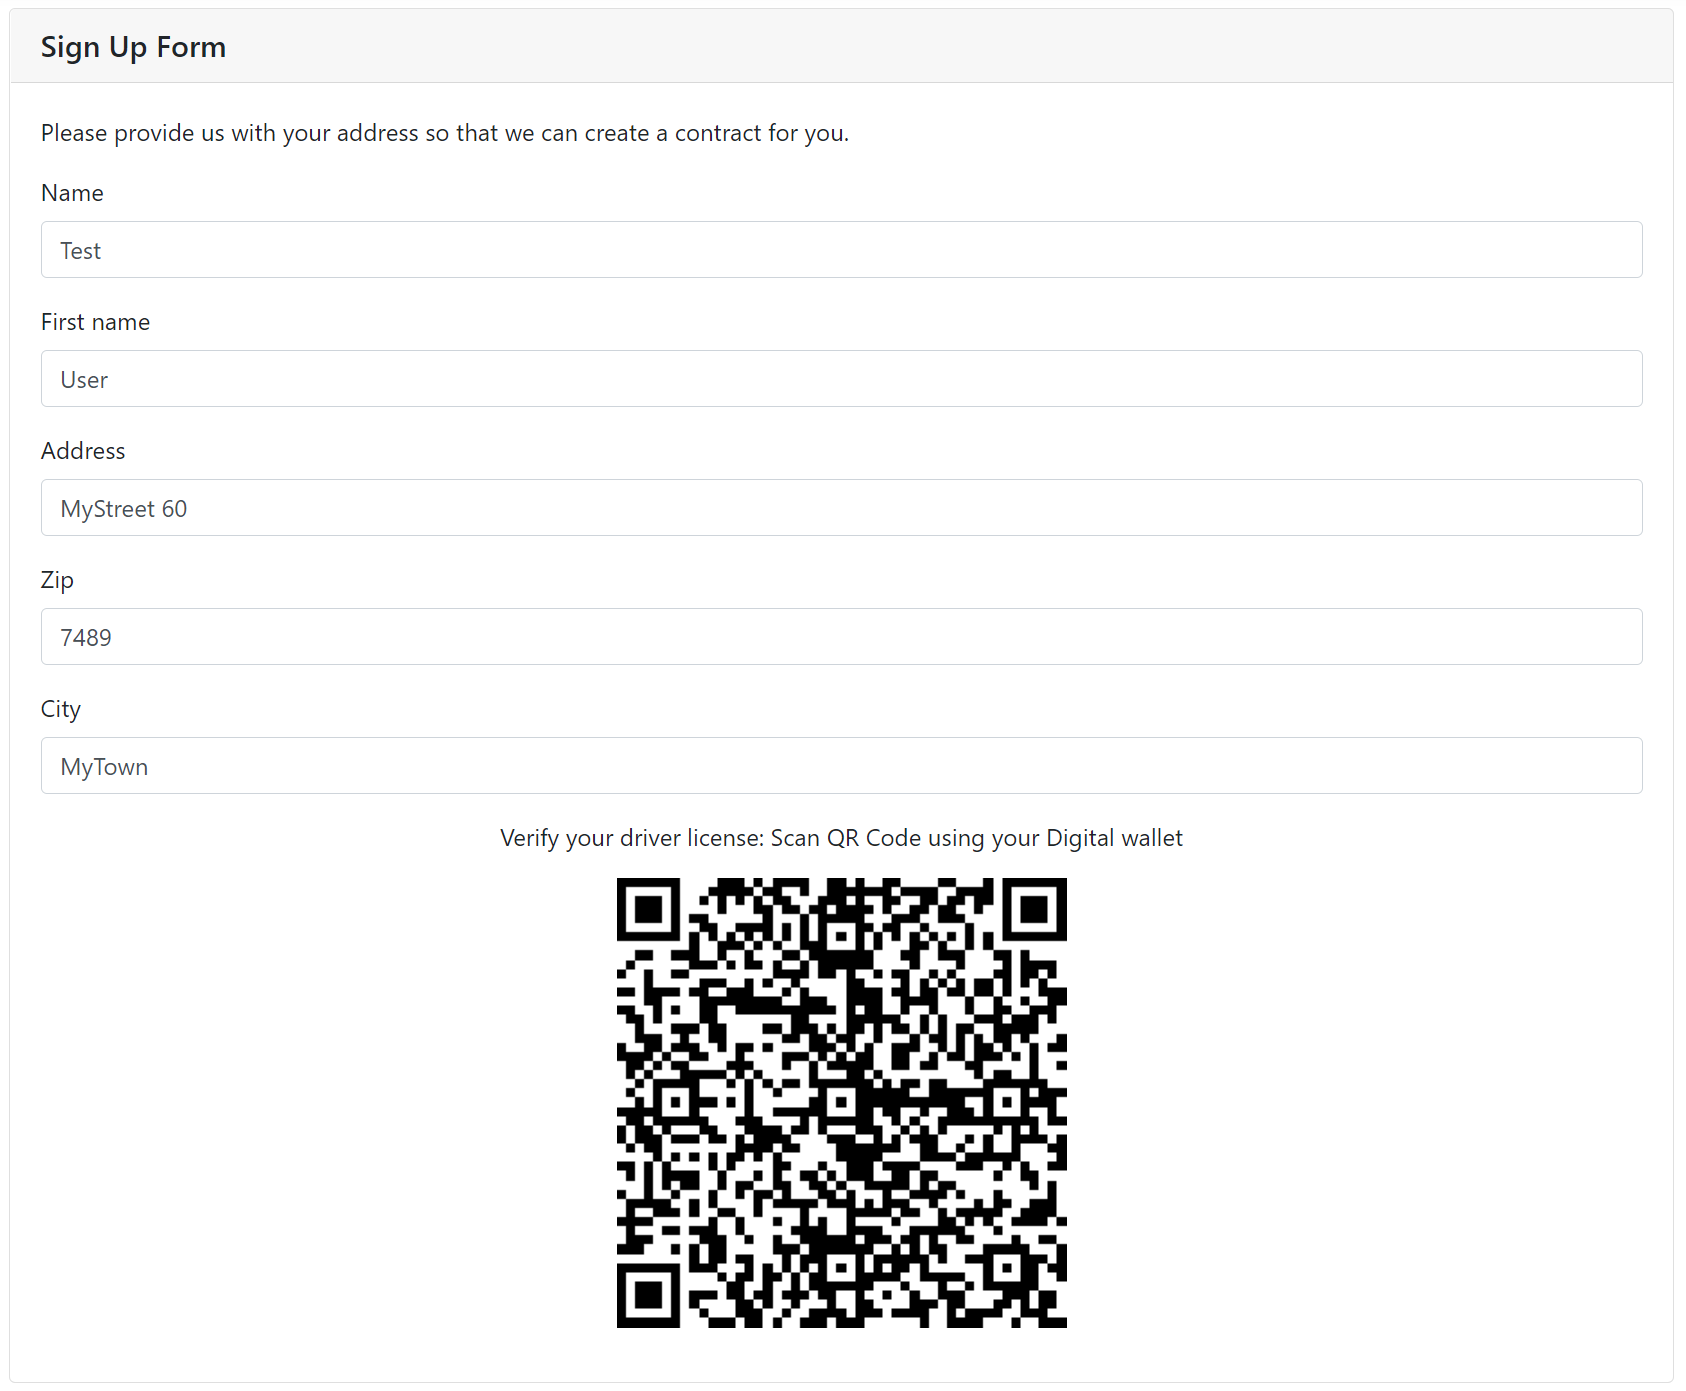
In our sample application if a customer wants to sign up for a new insurance we ask them to verify their driver license. During this step we call the Trinsic API to create a verification request. From the API call we get a url that can be embedded inside a QR Code. This QR code can then be scanned by the credential holder inside of their wallet application and they can approve the request with their credential obtained by the issuer. Upon successful verification the form gets submitted to the backend for further processing.
Summary
The goal of this blog post was to show how easy it is to work with verifiable credentials. If you read the docs and all the post that are out there it might be overwhelming with all the terminology about blockchain and so on. I think Trinsic have done a good job with making this technology accessible for any developer. Yet there is like always room for improvement.
More on this topic can be found on the Trinsic documentation page.
If you like this blog post drop a comment or buy me a coffee at the bottom of the page
comments powered by Disqus