Versioning is next to naming one of the hardest parts in software development. First to get it right (well is there a right or wrong?) and second to make your customers understand what the version bump means. Thanks to SemVer2 this has become a lot easier and a lot more understandable. But still many of us who use CI Build Systems like Azure DevOps use the default build number generated by the system and also do not update the version of the compiled output. If you would check the properties of the assembly a lot will have version 1.0.0.0.
What is SemVer?
SemVer stands for Semantic Versioning. It states some rules and requirements that dictate how version numbers are assigned and incremented.
Given a version number MAJOR.MINOR.PATCH, increment the:

MAJOR version when you make incompatible API changes,
MINOR version when you add functionality in a backwards compatible manner, and
PATCH version when you make backwards compatible bug fixes.

Additional labels for pre-release and build metadata are available as extensions to the MAJOR.MINOR.PATCH format.
You can find more here. But this is all the magic you need to know.
How to apply SemVer to your project
It is fairly simple in a ASP.NET Core project to set your version number. Just open your csproj file and add a version element. You can even specify a suffix for your alpha or beta versions.
<PropertyGroup>
    <TargetFramework>netcoreapp3.1</TargetFramework>
    <Version>1.2.3.4</Version>
</PropertyGroup>
This will result in the following assembly:
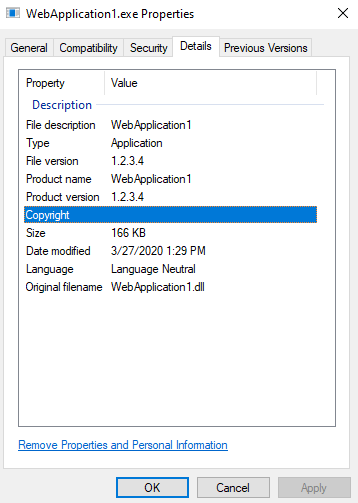
This might be good enough for you as a single developer. Bumping the version numbers manually and so on. But if you are working in a team, working on different features and using pull requests, you will forget to increment the version number properly and you will end up with merge conflicts just because of this.
So how can we solve manual versioning?
This is pretty straight forward: automate it! First everyone created their own powershell scripts that could be used to set the version number. But the most important thing is to change the responsibility of who is in charge of creating the version number. This responsibility should not lay with the developers but with the build system. When you are using Git you have a history of commits and merges and so on. Using this history you can build a version number. Please do not write your own script for this. There are tools like GitVersion or as the title of this post gave away Nerdbank.GitVersioning. Until now I have been using GitVersion but I like the fact that Nerdbank.GitVersioning is a dotnet tool that can be installed during the build and has first class support for cloud build servers like Azure DevOps.
Link to Repository: https://github.com/dotnet/Nerdbank.GitVersioning
Getting started with Nerdbank.GitVersioning
Next I will show in a few steps what you have to do so that you can add versioning to your project.
Installing Nerdbank.GitVersioning
To install the Nerdbank.GitVersioning dotnet tool, run one of the following commands:
dotnet tool install --tool-path . nbgv
or if you want to install it globally on your machine:
dotnet tool install -g nbgv
I installed the tool using the first command. This requires me to call the tool with
./nbgv.exe. If you installed it globally, you can just callnbgvfrom your console.
Prepare the project
First we need to prepare the project to have versioning applied to it. Just run the install command from within the root of your git repository.
.\nbgv.exe install
This command will create two files, version.json and Directory.Build.props.
The version.json file which contains all the information required to build the correct version number. More details can be found here.
Update your version.json
I changed the default version.json just a bit. I removed the cloudBuild section, because I wanted to call that explicitly from the pipeline. I also set the version to 1.0 and added a tag to the release.
{
  "$schema": "https://raw.githubusercontent.com/dotnet/Nerdbank.GitVersioning/master/src/NerdBank.GitVersioning/version.schema.json",
  "version": "1.0-preview",
  "publicReleaseRefSpec": [
    "^refs/heads/master$",
    "^refs/heads/v\\d+(?:\\.\\d+)?$"
  ],
  "release": {
    "firstUnstableTag": "preview"
  }
}
Update your azure-pipelines.yml
I am using a azure-pipelines.yml file for defining my build pipeline. All you need to do is add two steps to your pipeline. The first one that installs the tool and the second one that makes sure the version is being set.
trigger:
- master

pool:
  vmImage: 'windows-latest'

variables:
  buildConfiguration: 'Release'

steps:

- task: DotNetCoreCLI@2
  displayName: Install NBGV tool
  inputs:
    command: custom
    custom: tool
    arguments: install --tool-path . nbgv

- script: nbgv cloud
  displayName: Set Version

- script: dotnet build --configuration $(buildConfiguration)
  displayName: Build

- script: dotnet publish --no-build -o "$(Build.ArtifactStagingDirectory)" --configuration $(buildConfiguration)
  displayName: Publish

- task: PublishBuildArtifacts@1
  displayName: Publish Build
  inputs:
    pathtoPublish: '$(Build.ArtifactStagingDirectory)'
    artifactName: 'drop'
    publishLocation: 'Container'
If you now build the master branch you will see that the build number will be updated. Also if you check the source code now, you will see inside of the properties that the version has been updated accordingly.
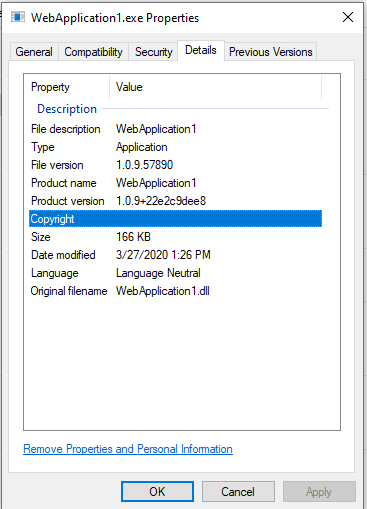
And all this with just adding this simple tool.
How to use this in your workflow
I mostly follow the GitHub Flow where I have a master branch, create branches of master, create a Pull Request and then squash merge the PR into master. The master branch gets deployed to the staging environment and represents the current development stage. For releases I like to create release branches which then get deployed to staging for final approval and can then be promoted to production. You can do the same for libraries and can have a preview / beta channel this way.
If you use this kind of flow, it is very easy to integrate Nerdbank.GitVersioning. There is an awesome feature which lets you prepare your releases and updates the version according to the current version in the version.json.
Run the command:
.\nbgv.exe prepare-release
And it will automatically create the proper release branch and update the version.json for you.
C:\dev\Demo [master ≡]> nbgv prepare-release

v1.0 branch now tracks v1.0 stabilization and release.
master branch now tracks v1.1-preview development.
Using the version when creating a NuGet
If you are creating a NuGet package as part of your build you can use one of the build variables and pass it in to the pack command.
- powershell: |
    mkdir $(Build.ArtifactStagingDirectory)\Packages
    $version = .\nbgv.exe get-version -f json | ConvertFrom-Json
    dotnet pack --no-build /p:NuspecProperties="version=$($version.NuGetPackageVersion);RepositoryType=git;RepositoryCommit=$($version.GitCommitId);"
  displayName: Create packages
Summary
To sum it up there is not much more to say then Versioning just got a little bit simpler. Of course you still have to make sure that your customers know what each version bump means and also the developers have to know what a breaking change is so that they can increase the major version for example. If you need more information or more details either go to the repository and go through the documentation or drop me a comment below.
If you like this blog post drop a comment or buy me a coffee at the bottom of the page
comments powered by Disqus